Steps
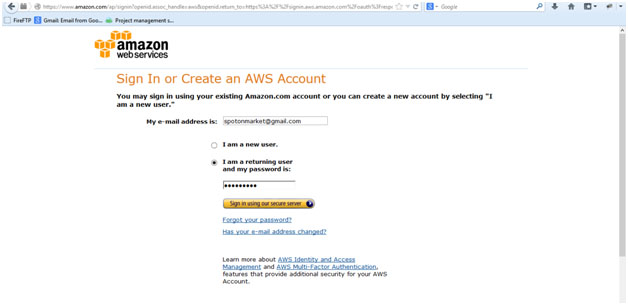
- Sign In to amazon
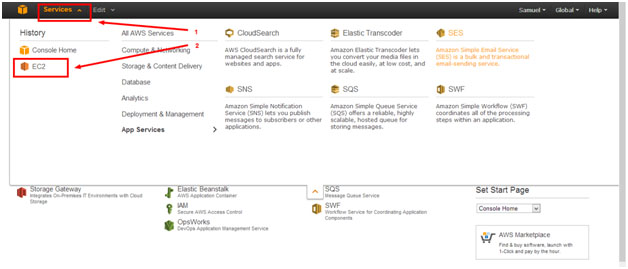
2. Go to My Account/Console -> AWS Management Console

3. Go to Compute & Networking Column and look for EC2 [Virtual Servers in the Cloud] or Click on Services at the top bar and look for EC2
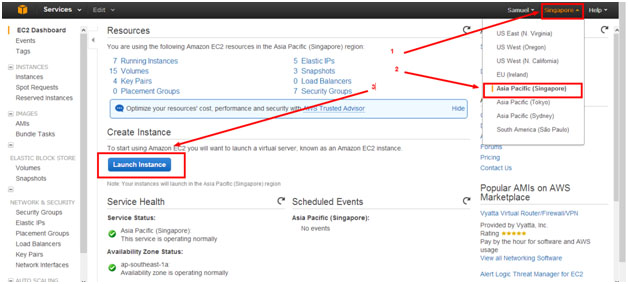
4. At the top dark grey bar beside your account name, Click the next tab with a white arrow and select where the server is located. In the figure below, we set to Singapore.
Click the Launch Instance Button when it’s ready.
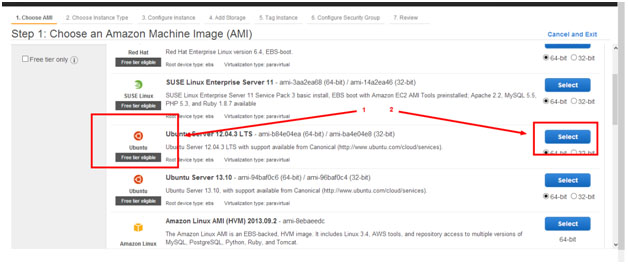
5. Choose an Amazon Machine Image [We used the ubuntu server 12.04.3], Click the select button to proceed
 6. Choose Instance Type, for this we have used t1.micro because it is free. We can select other option but it’s not free. Click Next: Configure Instance Details button to proceed.
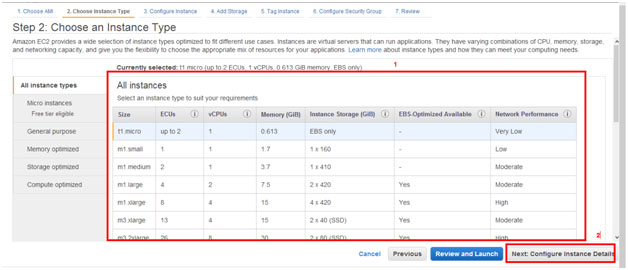
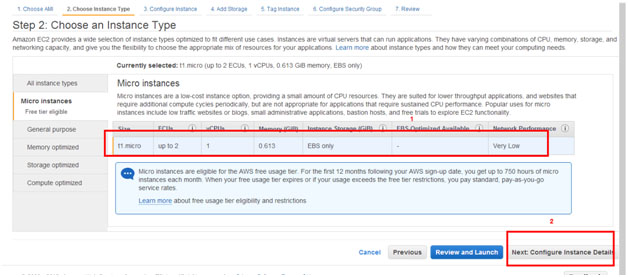
6.1 Select the free Instance Type as illustrated on the figure below
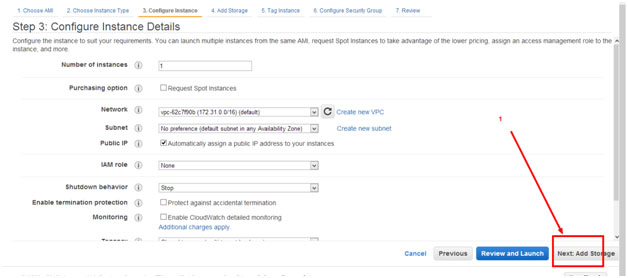
7. Configure Instance [Leave as it is] and clickt he Next: Add Storage button to proceed
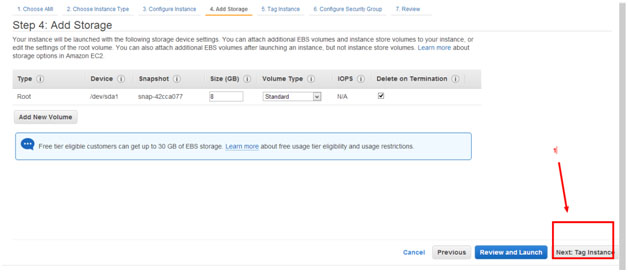
 8. Add Storage [Leave as it is] and click the Next: Tag Instance
 9. Enter the website description or website name or domain as the value. See the next figure
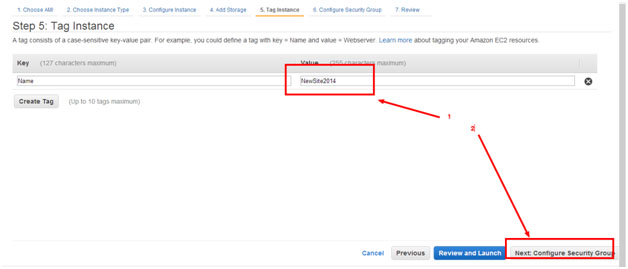
Click Next: Configure Security Group button to proceed with the process
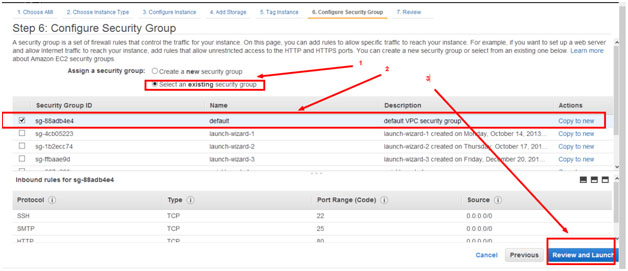
10. Configure Security Group
Select an existing security group and check the default one and click the Review and Launch button to proceed
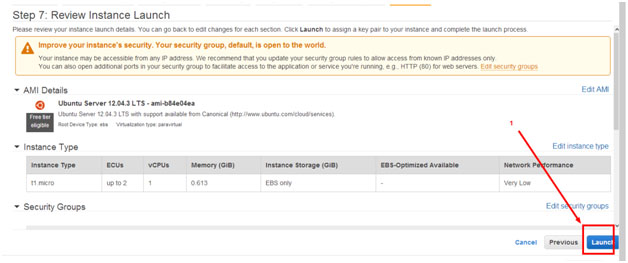
11. Review Instance Launch[Leave as it is] and click the launch button
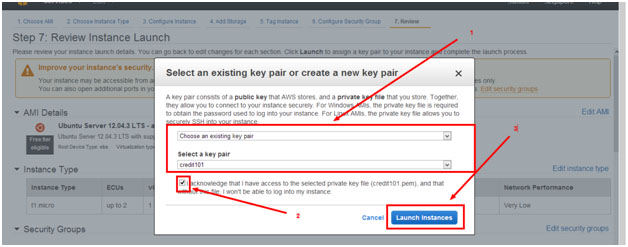
 12. On the dropdown, select Choose an existing key pair because we already added one via filezilla which appears on the second dropdown. If we don’t have existing key yet, see step 13
 13. How to add key pair?
13.1Open filezilla
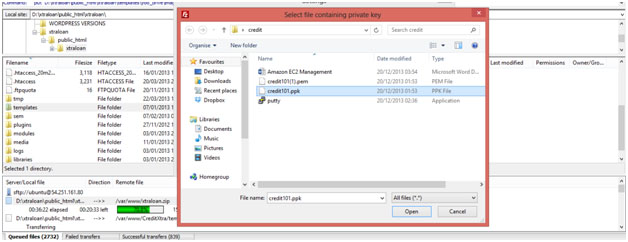
13.3 Go to Edit->settings->Connection->SFTP and add key file by clicking the button Add keyfile
Figure 1

Figure 2
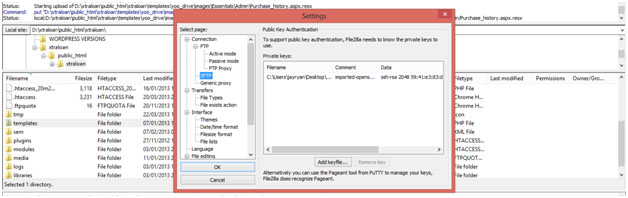
Figure 3
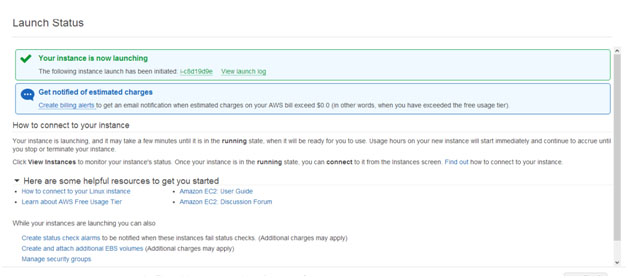
14, Launch Status – Figure below represents successful instance
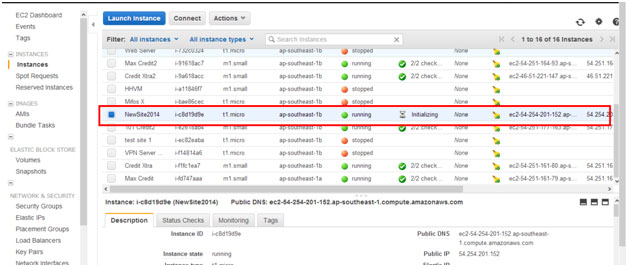
 15. Check if the new Instance is listed – below shows our new listed instance.
Enjoy!!! If you have problem, you can contact me ryansians@gmail.com to request a quote